Node JS uses npm – a package manager for the JavaScript programming language that consists a command line client and an online database of public/private packages called the npm registry.
Today, we’re going to guide to create and build an interactive CLI Application in Node.js as we can get it done by answering a very few questions in a shot. Finally, it will create a MongoDB based on the answers it’s received.
List Of NPM Packages
In our CLI application, we are using the following npm modules :
- Commander — The complete solution for node.js command-line interfaces, which helps us to construct our CLI interface (https://www.npmjs.com/package/commander)
- Inquirer — A collection of common interactive command line user interfaces, which provides the user interface and an inquiry session flow. (https://www.npmjs.com/package/inquirer)
- Chalk – As the name describes, it helps to apply styling on Terminal string (https://www.npmjs.com/package/chalk)
- Figlet – Fully implement the FIGfont spec in JavaScript. It works in the browser and with Node.js (https://www.npmjs.com/package/figlet)
- Mongoose – Mongoose is a MongoDB object modeling tool designed to work in an asynchronous environment. (https://www.npmjs.com/package/mongoose)
The planned CLI will do just one thing: It will collect the Employee information and store it in MongoDB.
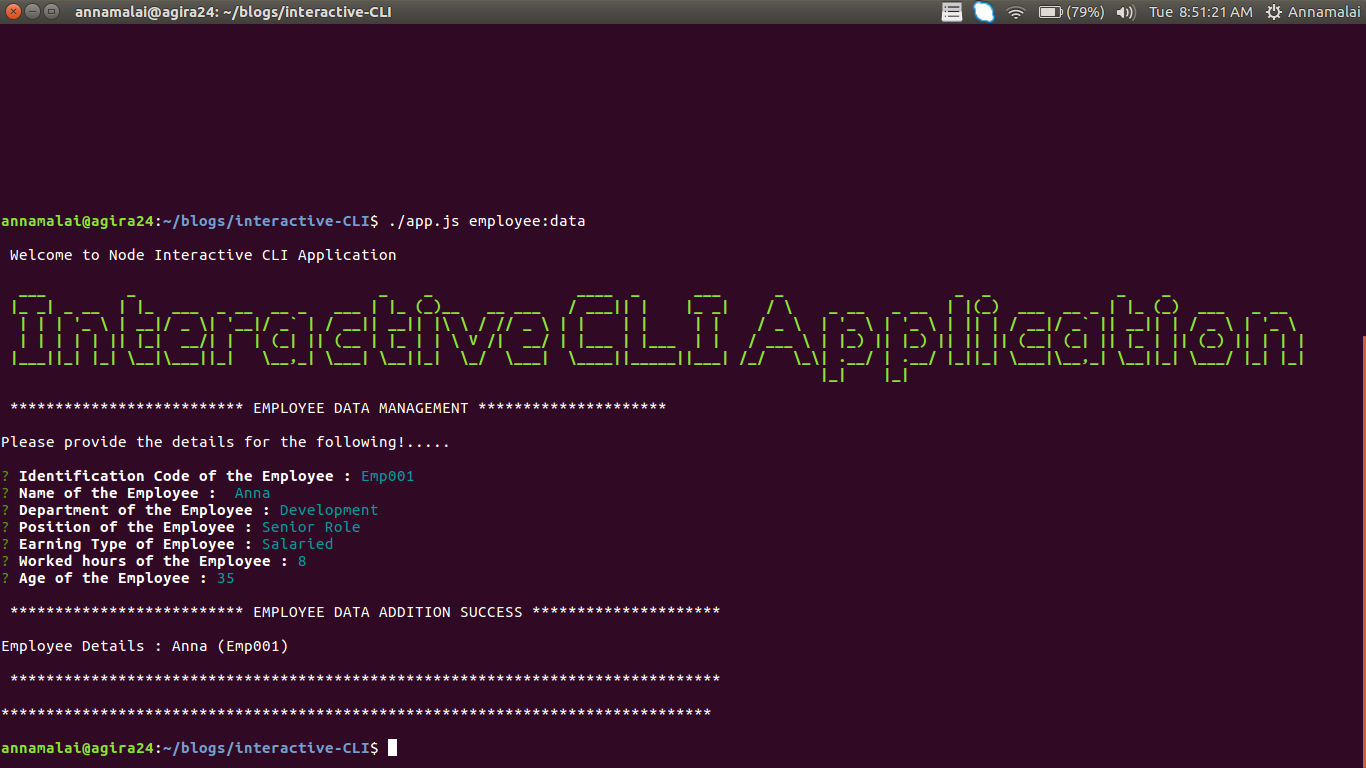
The CLI Application will ask interactive questions, about the Employee, such as :
Identification Code of the Employee :
Name of the Employee :
Department of the Employee :
Position of the Employee :
Earning Type of Employee :
Worked hours of the Employee :
Age of the Employee :
Based on the collected information, it would store the Employee information in MongoDB database.
Steps To Build An Interactive CLI Application With Node.js
Build CLI application
Build CLI application with the help of ‘index.js’ file which consists the basic commands. For example,
Let’s start with a simple CLI application, by creating an ‘index.js’ requiring the described NPM packages.
#!/usr/bin/env node
const mongoose = require('mongoose');
const Employee = require('./models/Employee');
const app = require('commander');
const inquirer = require('inquirer');
const chalk = require("chalk");
const figlet = require("figlet");
The first line of the file starts with the ‘bash’ command to notify it’s the environment as ‘node’.
Also, please note the necessary NPM packages which need to be installed within the application directory and you can install it using ‘npm install –save <package-name>’
Run Your CLI Application
To execute the application, just Save the file as ‘index.js’ and execute the below script to make the file executable: chmod +x ./index.js
chalk.green.bold(
  figlet.textSync("Interactive CLI Application", {
    horizontalLayout: "fitted",
    verticalLayout: "default"
  })
)
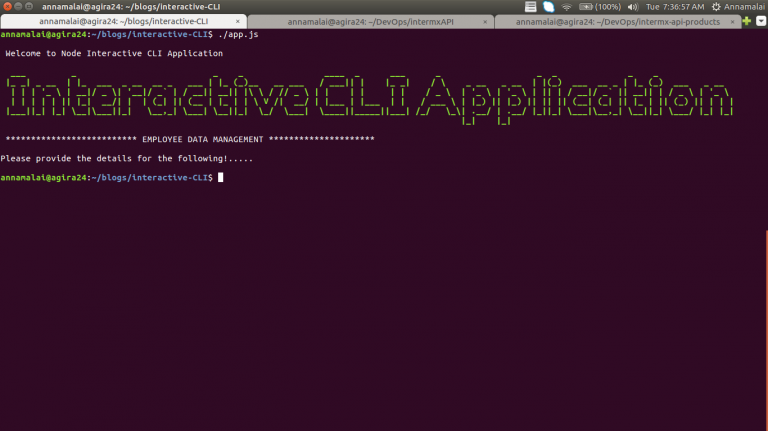
This would help us to provide a welcome message in the following format. We can also different horizontal & vertical layout as per the npm chalk documentation support.

Create A command Line Application Using NPM Commander
Then we construct our application with the .option() method that allows us to parse the option to the application. We can use -n or — name to pass the name as well as -e or –environment as the option to accept the environment value.
The npm commander provides several options which can be used while constructing the application.
Launch Command Line Prompts With NPM Inquirer
To launch the Prompt interface (where we can collect the input data) we are using the NPM inquirer, for the inquiry session. Questions (Array) containing Question Object (using the reactive interface, is the input object for the inquirer to collect the interactive inputs.
For this application, we have constructed the ‘input’ object as follows :
const inputDataCollection = [
    {type: 'input', name: 'employeeId', message: 'Identification Code of the Employee :'},
    {type: 'input', name: 'employeeName', message: 'Name of the Employee : '},
    {type: 'input', name: 'department', message: 'Department of the Employee :'},
    {type: 'input', name: 'position', message: 'Position of the Employee :'},
    {type: 'input', name: 'earningsType', message: 'Earning Type of Employee :'},
    {type: 'input', name: 'workedHours', message: 'Worked hours of the Employee :'},
    {type: 'input', name: 'age', message: 'Age of the Employee :'}
  ]
This ‘inputDataCollection’ will be used with the ‘Prompt’ to collect the input data as .prompt(inputDataCollection)
Integrating MongoDB With Node.js
You can connect to MongoDB using the mongoose.connect() method.
mongoose.connect('mongodb://localhost:27017/interactive-CLI', {useNewUrlParser: true});
IT won’t take much of your effort, you can simply get the application database running locally on the default port (27017). If the connection fails on your machine, try using 127.0.0.1 instead of localhost.
Mongoose also supports several more parameters in the URL like buffering, options, etc.
Collecting user input in node.js
After connecting with Mongoose, we can get the input in callback as follows:
const {employeeId, employeeName, department, position, earningsType, workedHours, age } = response;
We can also parse the response, if needed you could convert it into numeric values as follows.
const numericHours = parseInt(workedHours);
const numericAge = parseInt(age);
Tips To Read: How To Convert HTML To PDF Using Node.js
Create A Directory In Node.js
We can create a ‘model’ directory with the ‘employee.js’ and to define the mongoose model schema in employee.js you can follow the below steps where I have explicitly defined column information.
const {Schema, model} = require('mongoose');
const EmployeeSchema = Schema ({
employeeId : String,
employeeName : String,
department : String,
position : String,
earningsType: String,
workedHours: Number,
age : Number
}, {
versionKey : false
})
module.exports = model('Employee', EmployeeSchema);
This will help us to define certain standards and interact with the MongoDB collection.
Save Data In MongoDB
Once the input request is collected from the user, we can pass them to the model function using Interactive-CLI, to create an entry in the MongoDB collection, you can run the below code.
const Employee = require('./models/Employee');
Employee.create({
          employeeId, employeeName, department, position, earningsType,
          workedHours: numericHours,
          age : numericAge
        });
Emit Event Data In Node.js
This will successively write the information into the collection when the “Employee.create” emits the successful ‘result’ object using the provided input data, otherwise, it will be thrown in the ‘catch’ part when any error occurs.
console.log(`Employee Details : ${result.employeeName} (${result.employeeId})`);
Process.exit()
Use this command to exit the application from the terminal.
Best To Read: How To Secure Node.js RESTful APIs With JSON Web Tokens
Result:
Now, we have created an Interactive CLI application that prompts the users with interactive inputs, connects to MongoDB and creates the user using Commander, Inquirer, and Mongoose.
The only drawback is, as we are doing almost everything on the Interface layer, some of them may ignore design patterns. Other than that, it will be easy to interact with and also it will be very helpful for the beginners to get started.
[contact-form-7 404 "Not Found"]


